Imagine sinking your teeth into a burger that’s more than just a burger. This isn’t your average patty; it’s a symphony of textures and bold flavors. We’re talking about a juicy beef patty, grilled to perfection, then crowned with a rich, savory chili and a blanket of gooey, melted cheese. This recipe elevates the humble burger into a truly satisfying meal.
This recipe works because it balances the robust flavor of a perfectly seasoned beef patty with the complex, comforting notes of a homemade chili. The chili isn’t just an afterthought; it’s a star in its own right, simmered with aromatic spices that complement the beef beautifully. The melted cheese then ties everything together, adding a creamy, salty finish that truly makes each bite irresistible. It’s a hearty, comforting dish that promises to be a crowd-pleaser every single time. Get ready for a taste sensation!
Recipe Overview
Prep Time: 25 minutes
Cook Time: 45 minutes (includes chili simmer time)
Servings: 4 generous burgers
Difficulty Level: Moderate. The steps are straightforward, but making the chili from scratch adds a little extra time and layering of flavors.
Equipment Needed: A large heavy-bottomed pot or Dutch oven for the chili, a large skillet or grill pan for the burgers, a sturdy spatula, mixing bowls, and a sharp knife. For substitutes, a deep saucepan can work for the chili, and a cast-iron pan is excellent for searing burgers if a grill pan isn’t available.
Make-Ahead Options: The chili can be prepared up to 3 days in advance and stored in an airtight container in the refrigerator. This actually allows the flavors to deepen, making it even more delicious. You can also form the burger patties ahead of time, cover them, and refrigerate for up to 24 hours.
Ingredients
Main Ingredients
- 1.5 pounds ground beef (80/20 lean-to-fat ratio) – for juicy burgers
- 4 burger buns – brioche or potato buns work wonderfully
- 4 slices cheddar cheese – sharp or mild, your preference
- 1 tablespoon olive oil – for cooking
- Salt and freshly ground black pepper – to taste
For the Chili Topping
- 1 tablespoon olive oil
- 1 pound ground beef (85/15 lean-to-fat ratio) – for the chili base
- 1 large onion, finely diced
- 2 cloves garlic, minced
- 1 (14.5 ounce) can diced tomatoes, undrained
- 1 (15 ounce) can kidney beans, drained and rinsed
- 1 (8 ounce) can tomato sauce
- 1/2 cup beef broth
- 2 tablespoons chili powder
- 1 teaspoon ground cumin
- 1/2 teaspoon smoked paprika
- 1/4 teaspoon cayenne pepper (optional, for heat)
- 1/2 teaspoon dried oregano
- 1/4 teaspoon salt
- 1/8 teaspoon black pepper
For the Garnish
- 1/4 cup chopped fresh cilantro – for a bright finish
- 1/4 cup sliced pickled jalapeños – for a tangy kick
- 2 tablespoons sour cream or plain yogurt – for coolness and creaminess
The ground beef for the patties is your foundation. An 80/20 blend ensures a juicy, flavorful burger that won’t dry out. For the chili, a slightly leaner blend like 85/15 is excellent, as it will render less fat into the sauce, keeping it rich but not greasy. Good quality burger buns are crucial; they need to be sturdy enough to hold all that delicious chili without falling apart. Cheddar cheese is a classic choice, melting beautifully and adding a tangy counterpoint to the rich chili.
The onion and garlic form the aromatic base of the chili, building depth of flavor. Diced tomatoes and tomato sauce provide the essential tomato backbone, while kidney beans add texture and heartiness. Beef broth helps to thin the chili to the perfect consistency and intensifies the meaty flavor.
The blend of chili powder, cumin, smoked paprika, cayenne, and oregano creates that iconic, warm, and spicy chili profile. Don’t skip the fresh cilantro and pickled jalapeños for garnish; they add essential freshness and a bright, acidic contrast. A dollop of sour cream or plain yogurt provides a lovely cooling creaminess.
Pro Tips
- Don’t Overwork the Burger Patties: When forming your beef patties, handle the meat as little as possible. Overworking the ground beef can compress the proteins, leading to a tough, dense burger. Keep them loosely formed, about 3/4-inch thick, and make a small indentation in the center with your thumb to prevent them from bulging in the middle during cooking.
- Layer Flavor in the Chili: Take your time browning the ground beef for the chili until it’s deeply caramelized. This browning creates a rich, umami base. Then, properly sauté the onions and garlic until softened and fragrant; don’t rush this step. Allowing the spices to bloom in the hot oil for about 30-60 seconds after the aromatics will also enhance their flavor significantly before adding liquids.
- Toasting the Buns is a Must: A properly toasted bun provides structural integrity against the juicy patty and chili, preventing sogginess. It also adds a delightful texture and a slightly nutty flavor that enhances the entire burger experience. Lightly butter and toast them on the grill or in a pan until golden brown.
- Achieve the Perfect Melt: To get that wonderfully gooey, melted cheese, place the cheese slice on the burger patty during the last 1-2 minutes of cooking. For an even quicker melt, you can cover the pan with a lid, creating a steamy environment that helps the cheese become perfectly molten.
Instructions
Step 1: Prepare the Chili Topping
First, let’s get that glorious chili going. Heat 1 tablespoon of olive oil in a large heavy-bottomed pot or Dutch oven over medium-high heat. Add 1 pound of ground beef and break it up with a spoon. Cook, stirring occasionally, until the beef is fully browned and no pink remains, about 6-8 minutes. Drain off any excess fat.
Next, add the finely diced onion to the pot and cook until it softens and becomes translucent, about 5 minutes. Stir in the minced garlic and cook for another 1 minute until fragrant. Now, it’s time for the spices! Add the chili powder, ground cumin, smoked paprika, cayenne pepper (if using), and dried oregano. Cook, stirring constantly, for about 30-60 seconds until the spices are fragrant. This “blooming” step really brings out their flavor.
Pour in the diced tomatoes (undrained), tomato sauce, beef broth, salt, and black pepper. Stir everything together well. Bring the chili to a gentle simmer, then reduce the heat to low, cover the pot, and let it simmer for at least 30 minutes, or up to 1 hour, stirring occasionally. This low and slow cooking allows the flavors to meld and deepen. Stir in the drained and rinsed kidney beans during the last 10 minutes of simmering. Taste and adjust seasoning as needed. The chili should be rich and slightly thick.
Step 2: Form and Season the Burger Patties
While the chili simmers, prepare your burger patties. Divide the 1.5 pounds of ground beef into 4 equal portions. Gently form each portion into a patty, about 3/4-inch thick and slightly wider than your burger buns, as they will shrink during cooking. Remember, don’t overwork the meat! Press a shallow indentation into the center of each patty with your thumb. This helps the burger cook evenly and prevents it from puffing up in the middle.
Generously season both sides of each patty with salt and freshly ground black pepper. Don’t be shy with the seasoning; it makes a big difference!
Step 3: Cook the Burgers and Toast the Buns
Heat 1 tablespoon of olive oil in a large skillet or grill pan over medium-high heat. Once the oil is shimmering, carefully place the seasoned burger patties into the hot pan. Cook for 3-5 minutes per side for medium-rare, or 6-8 minutes per side for well-done, depending on your preferred doneness. You’ll see a beautiful brown crust forming.
During the last 1-2 minutes of cooking, place a slice of cheddar cheese on top of each burger patty. If desired, cover the pan with a lid for about 30 seconds to help the cheese melt quickly and evenly. Once the cheese is gloriously melted, remove the patties from the pan and set them aside to rest for a couple of minutes. This allows the juices to redistribute, ensuring a more tender burger.
While the burgers are cooking or resting, lightly butter the cut sides of your burger buns. Place them cut-side down in the same hot pan or on a separate skillet. Toast until golden brown and slightly crispy, about 1-2 minutes. This creates a barrier against sogginess and adds wonderful texture.
Step 4: Assemble Your Chili Cheeseburgers
Now for the best part—assembly! Place the toasted bottom bun on your serving plate. Carefully place a cheesy burger patty on top. Next, spoon a generous amount of your warm, homemade chili over the burger. Don’t be afraid to pile it high!
Finally, add your desired garnishes. A sprinkle of fresh chopped cilantro adds brightness, while a few sliced pickled jalapeños provide a fantastic tangy kick and a bit of heat. A dollop of sour cream or plain yogurt on top offers a cooling, creamy contrast. Crown it all with the toasted top bun. Serve immediately and prepare for a truly satisfying, messy, and delicious experience!
Variations & Customization
This chili cheeseburger is fantastic as is, but it’s also a wonderful canvas for your own culinary creativity!
Dietary Modifications
- Gluten-Free: Simply use gluten-free burger buns. Ensure your beef broth and chili powder are certified gluten-free, though most are by nature.
- Dairy-Free/Vegan: For a dairy-free version, omit the cheese and sour cream, or use dairy-free cheese slices and a dairy-free sour cream alternative. To make it fully vegan, swap the ground beef for a plant-based ground meat substitute (ensure it’s not soy-based if avoiding soy) and use vegan buns. The chili can be made vegan by omitting the beef and adding extra beans or lentils.
Flavor Variations
- Spicy Version: If you love heat, increase the cayenne pepper in the chili to 1/2 teaspoon or more, or add a pinch of red pepper flakes. You could also incorporate a diced serrano pepper along with the onion and garlic. A drizzle of your favorite hot sauce on the finished burger is also a great option.
- Smoky Twist: Add 1/2 teaspoon of liquid smoke to the chili for an even deeper, wood-fired flavor. You could also grill your burgers over charcoal for an authentic smoky taste.
- Vegetable Boost: Feel free to add diced bell peppers (any color) or grated carrots to the chili along with the onions for extra nutrients and flavor. They will soften beautifully as the chili simmers.
- Tex-Mex Flair: Consider adding a pinch of chipotle powder to the chili for a smoky, earthy heat. Garnish with a sprinkle of crumbled cojita cheese for a salty, tangy finish, or a dollop of guacamole for creamy richness.
Serving & Storage
Serving Suggestions
These chili cheeseburgers are a meal in themselves, but a few accompaniments can make the experience even better.
Plating Ideas: Serve your chili cheeseburger open-faced for a dramatic presentation, or with a skewer through the top to keep it stable if it’s piled high. A side of extra chili for dipping is never a bad idea!
Best Side Dishes: Classic pairings include a crisp green salad with a light vinaigrette to cut through the richness, or a side of crispy sweet potato fries or onion rings. For something lighter, consider coleslaw or grilled corn on the cob.
Non-Alcoholic Beverage Recommendations: A tall glass of sparkling lemonade or ginger ale provides a refreshing contrast. A berry mocktail or a simple iced tea would also be delightful. For something warm, a robust herbal tea like peppermint or hibiscus can be surprisingly complementary.
Storage Instructions
Refrigerator: Leftover chili should be stored in an airtight container in the refrigerator for up to 3-4 days. Cooked burger patties can also be stored separately in an airtight container for up to 2-3 days. It’s best to store the components separately to maintain texture.
Freezer: The chili freezes beautifully! Allow it to cool completely, then transfer it to freezer-safe containers or heavy-duty freezer bags. It can be frozen for up to 3 months. Thaw overnight in the refrigerator before reheating. Cooked burger patties can also be frozen for up to 2-3 months, wrapped individually in plastic wrap and then placed in a freezer bag.
Reheating: To reheat chili, gently warm it in a saucepan over medium-low heat, stirring occasionally, until heated through. You might need to add a splash of broth or water if it’s too thick. Reheat burger patties in a skillet over medium heat for a few minutes per side, or in a microwave until warmed through. For best results, don’t reheat the assembled burger; reassemble just before serving.
Frequently Asked Questions
1. Can I use pre-made chili for this recipe?
Absolutely! While homemade chili offers the best flavor, using a good quality, pre-made canned chili can definitely save time. Just be sure to choose a chili that isn’t too thin or watery, as you want it to cling to the burger patty. You might want to simmer it down a bit to thicken it if it seems too liquid. Taste and adjust seasonings to your preference, perhaps adding a little extra chili powder or cumin to boost the flavor.
2. What’s the best way to prevent the burger from getting soggy?
The key to preventing a soggy chili cheeseburger is a well-toasted bun. Lightly buttering and toasting your buns until they are golden brown and slightly crisp creates a barrier that holds up against the juicy patty and chili. Also, don’t assemble the burger too far in advance. Serve it immediately after assembly for the best texture. You can also place a lettuce leaf under the patty to add another protective layer if you wish.
3. Can I make this with ground turkey instead of beef?
Yes, you can certainly substitute ground turkey for the ground beef in both the patties and the chili. If using ground turkey, especially a leaner variety, you might want to add a little extra olive oil when browning to prevent it from sticking and drying out. The flavor profile will be slightly different, but still delicious. You might also consider adding a touch more seasoning to the turkey chili, as turkey can be milder in flavor than beef.
4. How can I make the chili thicker or thinner?
If your chili topping is too thin, simply simmer it uncovered for an additional 10-15 minutes, stirring occasionally, to allow some of the liquid to evaporate. If it’s too thick, add a tablespoon or two of beef broth or water at a time until it reaches your desired consistency. Remember, it will thicken slightly as it cools. Always taste and adjust seasonings after making adjustments to consistency.
5. What kind of cheese melts best on a chili cheeseburger?
Cheddar cheese is a classic for a reason; it melts beautifully and offers a great tangy flavor that complements the chili. Other excellent melting cheeses include Monterey Jack, Colby Jack, or even a good quality American cheese for ultimate meltiness. If you prefer a bit more kick, pepper jack would be a fantastic choice. The important thing is to choose a cheese that melts smoothly and doesn’t get greasy or rubbery.
Final Thoughts
There you have it—a chili cheeseburger that’s more than just a meal; it’s an experience. The effort you put into that homemade chili truly pays off, transforming a simple burger into something extraordinary.
Don’t be afraid to get a little messy; that’s part of the fun! Each bite offers a delightful combination of savory beef, spicy chili, and creamy cheese, all held together by a perfectly toasted bun. So go ahead, gather your ingredients, and create this masterpiece. Your taste buds will thank you!
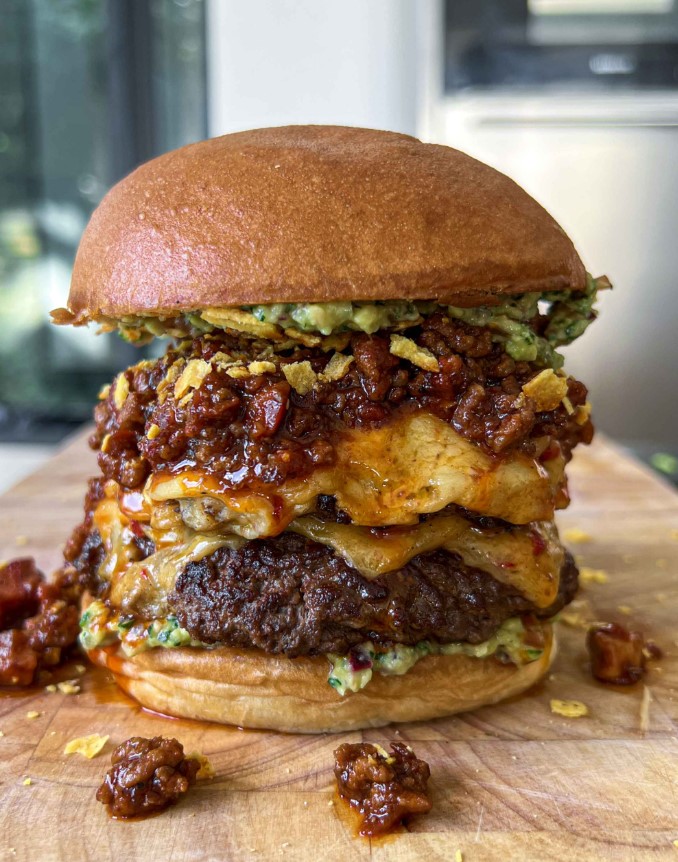
Ultimate Chili Cheeseburger: A Flavorful Stack
A robust chili cheeseburger featuring a juicy beef patty crowned with a rich, savory homemade chili and gooey melted cheddar cheese, perfectly balanced for a satisfying meal.
Cheeseburger
Homemade Chili
Beef Burger
Comfort Food
American Cuisine
Ingredients
- 1.5 pounds ground beef (80/20 lean-to-fat ratio)
- 4 burger buns
- 4 slices cheddar cheese
- 1 tablespoon olive oil
- Salt to taste
- Freshly ground black pepper to taste
- 1 tablespoon olive oil (for chili)
- 1 pound ground beef (85/15 lean-to-fat ratio)
- 1 large onion, finely diced
- 2 cloves garlic, minced
- 1 (14.5 ounce) can diced tomatoes, undrained
- 1 (15 ounce) can kidney beans, drained and rinsed
- 1 (8 ounce) can tomato sauce
- 1/2 cup beef broth
- 2 tablespoons chili powder
- 1 teaspoon ground cumin
- 1/2 teaspoon smoked paprika
- 1/4 teaspoon cayenne pepper (optional)
- 1/2 teaspoon dried oregano
- 1/4 teaspoon salt (for chili)
- 1/8 teaspoon black pepper (for chili)
- 1/4 cup chopped fresh cilantro
- 1/4 cup sliced pickled jalapeños
- 2 tablespoons sour cream or plain yogurt
Instructions
- Heat 1 tablespoon of olive oil in a large heavy-bottomed pot over medium-high heat. Add 1 pound of ground beef and cook until fully browned, about 6-8 minutes. Drain excess fat.
- Add the finely diced onion to the pot and cook until softened, about 5 minutes. Stir in minced garlic and cook for 1 minute until fragrant. Add chili powder, ground cumin, smoked paprika, cayenne pepper (if using), and dried oregano; cook, stirring, for 30-60 seconds.
- Pour in diced tomatoes, tomato sauce, beef broth, salt, and black pepper. Bring to a simmer, then reduce heat to low, cover, and simmer for at least 30 minutes, or up to 1 hour, stirring occasionally. Stir in kidney beans during the last 10 minutes.
- Divide 1.5 pounds of ground beef into 4 equal portions and gently form into 3/4-inch thick patties. Press a shallow indentation into the center of each. Season both sides generously with salt and freshly ground black pepper.
- Heat 1 tablespoon of olive oil in a large skillet or grill pan over medium-high heat. Cook patties for 3-5 minutes per side for medium-rare, or 6-8 minutes per side for well-done.
- During the last 1-2 minutes of cooking, place a slice of cheddar cheese on each patty. Cover the pan for 30 seconds to melt the cheese. Remove patties and let rest.
- Lightly butter and toast burger buns, cut-side down, in the same hot pan or a separate skillet for 1-2 minutes until golden brown.
- Assemble by placing a cheesy burger patty on a toasted bottom bun. Spoon a generous amount of chili over the burger. Garnish with chopped cilantro, pickled jalapeños, and a dollop of sour cream or plain yogurt. Top with the toasted bun and serve immediately.